转自:http://blog.csdn.net/gisshixisheng/article/details/17284383
作为一个本科侧重于应用,工作之后却做了开发的程序员来说,做GIS,开发应该是一门必修课,只是,苦于各种原因吧,做GIS应用的人会开发的很少,做GIS开发的大部分都是计算机出身,痛心疾首啊……
不好意思,刚开始,就唠叨两句,还望大家见谅。在Arcgis10的版本之后,ESRI公司推出了很方便的Add-In插件式开发,下面就Add-In做一个简单的介绍:
Add-In是一种能够快速扩展桌面应用程序功能的全新扩展方式。
作为ArcGIS 10中全新定制方法,它有以下特点:
(1)容易创建:ArcGIS提供了很多创建Add-In模板,并提供了详细的接口以实现各种功能。
(2)更易共享:Add-In本质上是一个Zip压缩文件这个压缩文件里面包含了,易于网络、邮件传输、易于局域网内共享。
(3)更加安全:可以对Add-In文件进行数字签名,使用的安全性得到保障。
(4)更易安装管理:只要安装有桌面软件,系统就能自动识别Add-In文件,双击即可安装部署,同时desktop也有用于管理Add-In的管理工具。
ArcGISAdd-In支持的类型
按钮和工具
组合框
菜单和右键菜单
Multi-items
工具条
Tool palettes
可停靠窗体
Application extensions
Editor extensions
在做Add-In开发需要安装ArcObjects for .net的开发包。下面就详细的介绍一个简单的例子:在Arcmap界面添加一个按钮,按钮对应的事件为添加shp数据。
1、开发环境
Vs2010+Arcgis10.0+win8 64bit
2、实现代码
首先在VS2010中新建一个解决方案,命名AddInTest。
接着,给解决方案AddInTest新建一个项目:
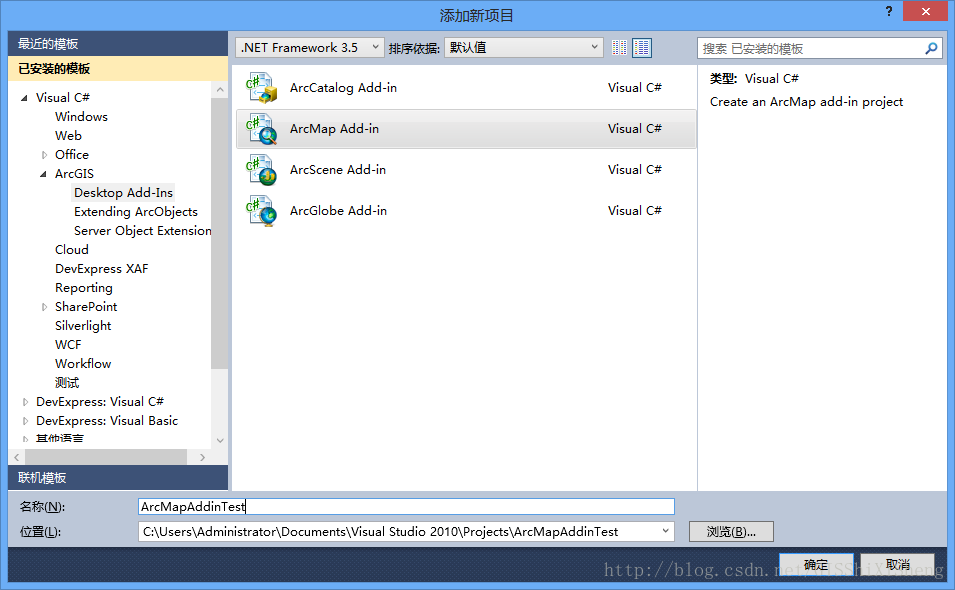
点击[确定],出现如下界面,直接点击[finish]。
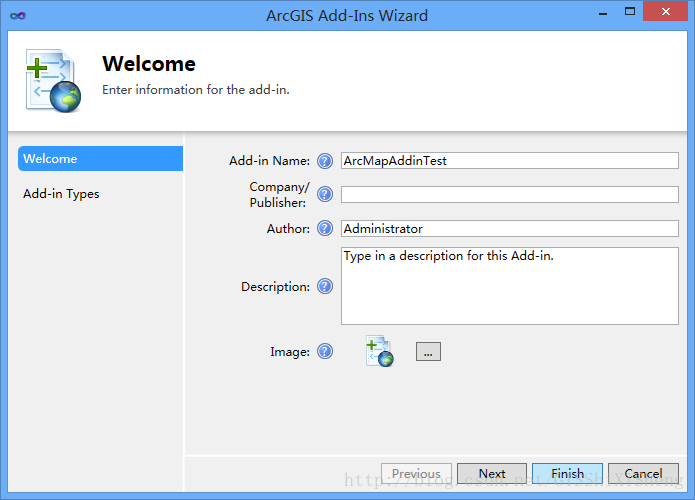
接着,给项目ArcMapAddinTest新建一个项目

点击[添加],设置相关信息,并点击[finish]完成。

上图中,class name是类的名称,caption是button显示的文字,category是所属的command的分类,tooltip是鼠标在上面时状态栏显示的文字,description是工具的描述。
项目建成后,文件组织如下图:
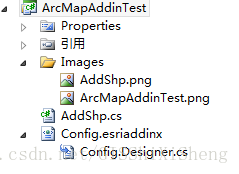
Config.esriaddinx是一个XML文件,是一个配置文件,里面包含了项目的相关配置,是自动生成的,内容如下:
- <ESRI.Configuration xmlns="http://schemas.esri.com/Desktop/AddIns" xmlns:xsi="http://www.w3.org/2001/XMLSchema-instance">
- <Name>ArcMapAddinTest</Name>
- <AddInID>{0f7ec41b-d1e3-4391-8d67-9dea10bea621}</AddInID>
- <Description>Type in a description for this Add-in.</Description>
- <Version>1.0</Version>
- <Image>Images\ArcMapAddinTest.png</Image>
- <Author>Administrator</Author>
- <Company></Company>
- <Date>2013/12/12</Date>
- <Targets>
- <Target name="Desktop" version="10.0" />
- </Targets>
- <AddIn language="CLR" library="ArcMapAddinTest.dll" namespace="ArcMapAddinTest">
- <ArcMap>
- <Commands>
- <Button id="ArcMapAddinTest_AddShp" class="AddShp" message="点击浏览shp文件并添加" caption="AddShp" tip="实现添加shp文件的功能" category="Add-In Controls" image="Images\AddShp.png" />
- </Commands>
- </ArcMap>
- </AddIn>
- </ESRI.Configuration>
- using System;
- using System.Collections.Generic;
- using System.Text;
- using System.IO;
- namespace ArcMapAddinTest
- {
- public class AddShp : ESRI.ArcGIS.Desktop.AddIns.Button
- {
- public AddShp()
- {
- }
- protected override void OnClick()
- {
- }
- protected override void OnUpdate()
- {
- }
- }
- }
里面包含两个方法,onclick和onupdate方法。onclick方法是点击按钮时,我们在里面写添加shp文件的代码。
首先,添加如下引用:
- using System.Windows.Forms;
- using ESRI.ArcGIS.ArcMapUI;
- using ESRI.ArcGIS.Carto;
- using ESRI.ArcGIS.Geometry;
- using ESRI.ArcGIS.Geodatabase;
- using ESRI.ArcGIS.DataSourcesFile;
onclick方法里,事件的实现代码如下:
- <span style="white-space:pre"> </span>IMxDocument pMxd;
- public Button1()
- {
- pMxd = ArcMap.Document as IMxDocument;
- }
- protected override void OnClick()
- {
- System.Windows.Forms.OpenFileDialog openFileDialog = new System.Windows.Forms.OpenFileDialog();
- openFileDialog.Filter = "shp(*.shp)|*.shp";
- openFileDialog.InitialDirectory = @"D:\";
- openFileDialog.Multiselect = false;
- DialogResult pDialogResult = openFileDialog.ShowDialog();
- if (pDialogResult != DialogResult.OK)
- {
- return;
- }
- string pPath = openFileDialog.FileName;
- string pFolder = System.IO.Path.GetDirectoryName(pPath);
- string pFileName = System.IO.Path.GetFileName(pPath);
- IWorkspaceFactory pWorkspaceFactory = new ShapefileWorkspaceFactory();
- IWorkspace pWorkspace = pWorkspaceFactory.OpenFromFile(pFolder, 0);
- IFeatureWorkspace pFeatureWorkspace = pWorkspace as IFeatureWorkspace;
- IFeatureClass pFC = pFeatureWorkspace.OpenFeatureClass(pFileName);
- IFeatureLayer pFLayer = new FeatureLayerClass();
- pFLayer.FeatureClass = pFC;
- pFLayer.Name = pFC.AliasName;
- ILayer pLayer = pFLayer as ILayer;
- IMap pMap = pMxd.FocusMap;
- pMap.AddLayer(pLayer);
- //
- // TODO: Sample code showing how to access button host
- //
- ArcMap.Application.CurrentTool = null;
- }
OnUpdate方法事件的代码如下:
- <span style="white-space:pre"> </span>protected override void OnUpdate()
- {
- Enabled = pMxd.FocusMap.LayerCount >= 0;
- }
代码编写完成后,编译程序,打开编译目录,编译文件如下:
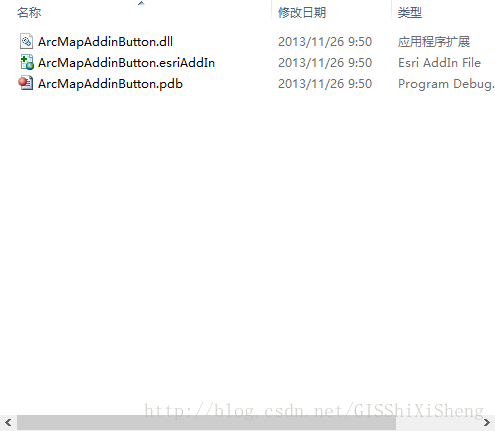
双击.esriAddIn文件,添加工具到Arcmap中。打开Arcmap,打开扩展管理,command选项卡,找到Add-In Controls,这时候你会发现你编写的工具会出现在这一组里面。
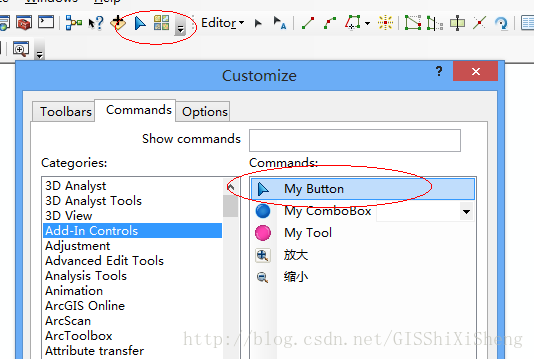
点击[close],点点试试……